Thursday, May 30, 2013

Video Tutorial Corel Draw: Menghilangkan Powerclip & Transparency

Jadi kasusnya adalah ketika klien mau membuka file coreldraw ku pakai software gratisan semacam ingskeip (baca: inkscape). Lalu kakak klien bilang vectoranku ancur dan morat-marit jaya. Setelah saya ingat-ingat, ya pantes lah. Soalnya file CDR dibuka di Inkscape tentu saja jadi aneh. Inkscape khan SVG mania. Trus, apakah saya bisa mengatasinya?
BISA BANGET!!!
Masalahnya cuma satu! Powerclipnya Corel Draw nggak kebaca di inkscape. Walhasil aku klik kanan lalu extract contentnya, lalu aku trim satu-satu. Bingung ya dirimu? Musti baca semua tutorialku di sini sayang.
Karena ini tips, makanya aku rekam dalam bentuk video deh. Langsung colokin webkem (baca: webcam) seharga 65 ribu beli di haitelmol THR Surabaya itu. Lalu ngecek suaraku. “Cek cek cek, sego becek enak rasane”. Oke sudah redi semuah. Tarik nafas dulu. Harus relax karena ini live gak pakek diulang. Oke siap! kemra rouloon… eksyen!
skrinsyut video tutorial
sekerinsyut si video tutorial yg udah saya edit biar agak ganteng dengan efek lens flare di photoshop biar makin dramatis..
:kiss:
Dan acara ngabuburit yg seharusnya jalan-jalan sore di alun-alun Nganjuk, malah aku habiskan dengan ngrekam video tutorial. Lha mumpung pingin e. Karena kalo sudah kepingin tapi nggak dilaksanakan, bisa ilang kepinginnya. Sama kayak kalo kamu kepingin gituan, kalo nggak dilaksanakan khan jadi stress uring-uringan dan cepat marah..
Lalu aku kasih bonus di tutorial ini, yauti eh yaitu “Cara Menghapus Transparency atau transparansi”. Soalnya gini, aku pernah ngesave as filecorel menjadi Ai (Adobe Illustrator). Dan dari ukuran beberapa puluh kilobait pun berubah menjadi bermegawati-mega bait. Setelah saya cek penyebabnya, ternyata ketika file Ai aku buka pakai Adobe Illustrator, banyak objek vector yg berubah/diconvert menjadi bitmap sama si Software Adobe Illustrator. Oh, oke baiklah. Berati aku harus menghindari transparency ketika ngerjain vector. Kalo kepaksa harus makai transparency, aku harus menransparankannya di software Ai langsung.
Kira-kira 14 (empat belas) menit ngrekam video. Agak ngeblank di awal-awal, bingung mau ngomong apa. Tapi semakin ke sini semakin lancar. Oke lah, videonya ada versi HD nya. Jadi kalo pingin jelas, harus download yg versi HD ya, pake IDM ya downloadnya.
Jadi kesimpulannya, kalo file corel anda kepingin bisa dibuka di software vector apa aja (Corel Draw, Adobe illustrator, Freehand, Inkscape, dll), maka bebaskanlah objek-objeknya dari power clip, transparency dan effect-effect berlebihan lainnya.
Akhirul kalam, selamat menunaikan ibadah puasa. Jangan lupa sholat tarowih biar tubuh bergerak dan sehat.
Wassalaamu’alaikum warohmatulloohi Wabarokaatuh.. *panjang pendeknya musti bener ya.. awas kalo salah!!! :pukul: *

Sumber: http://dzofar.com/2012/08/09/tutorial-corel-draw-menghilangkan-powerclip-transparency/

Wednesday, May 29, 2013

Belajar Menggambar Ilusi 3D

Iseng lihat foto ilusi 3D nya mas Dwi Ka (facebook.com/dwika73) di FB, dan langsung tertarik mau bikin. Sebelumnya ada mas Vioem (facebook.com/avioem) yg memang ahlinya bikin ilusi gambar 3D dan ilusi lainnya. Tapi tadi kebetulan mas Dwi Ka juga ngasih link tutorialnya. Seperti biasa, tutorialnya nonton di Yutub. Dan aku pun terpana melihat tutorial Belajar Menggambar Ilusi 3D di bawah ini:
Oke fine, aku tau kendala sampeyan, sama kayak kendalaku juga, hiyaitu: TUTORIALNYA PAKEK BOSO LINGGIS (baca: English)!!! Tapi jangan khawatir. Kita gak perlu paham apa yg dia ucapkan sih. Soalnya dia nggak ngomong doang, tapi sambil praktek. Makanya tonton sampe habis. Wong cuma 4 menit aja lo.
Nah, habis nonton aku langsung praktek juga. Menggambar boneka smiley yg selalu menemaniku dan membaikkan moodku. Jadilah gambar di bawah ini:
Smiley 3D illution by ndop™
Aha! Jadi sudah. Kendala yg saya hadapi adalah posisi mata harus konsisten memandang pada arah tertentu. Kalau geser dikit, ya gambarnya akan aneh. Hehe..
Tutorial singkatnya adalah
  1. kita taruh barang yg akan kita gambar di atas kertas gambar
  2. Lalu pegang pensil dan mulai menggambar di kertas dengan mengikuti garis luar secara prespektif terhadap benda aslinya. *aduh susah menjelaskannya. Jangan lupa gambar shadingnya. Jadi musti perlu bantuan lampu biar mudah.
  3. Kalau garis luarnya sudah selesai. Singkirkan barang itu lalu taruh di sebelahnya.
  4. Contoh barang sepersis-persisnya dengan sudut pandang yg HARUS sama dengan pas nggambar garis luarnya tadi. Yang penting peka aja terhadap gelap terang, saya rasa udah cukup
  5. Kalau sudah selesai. Saatnya diphoto. Jangan lupa sudut pandang pas moto harus sama dengan pas nggambar garis luar tadi.
  6. Selesai
Inilah hasil nggambar ilusi 3D saya selanjutnya (ceritanya ketagihan nih! HAHA)
Ilusi 3D botol by ndop™
Bagemana? Tertarik? Coba aja deh. Asyik kok. Syarat utama harus ada kamera sih. Bisa kamera HP dong. Halah, haregene semua juga punya hape berkamera khan? 

Keajaiban File PNG

Habis ngevector, biasanya saya export ke PNG. Karena vector itu warnanya solid. Gradasinya pun solid. Maka saya memilih PNG. Karena file PNG itu bagus untuk warna-warna solid. Sekaligus ukuran filenya NGIRIT!
Bukti? OKEH!!!
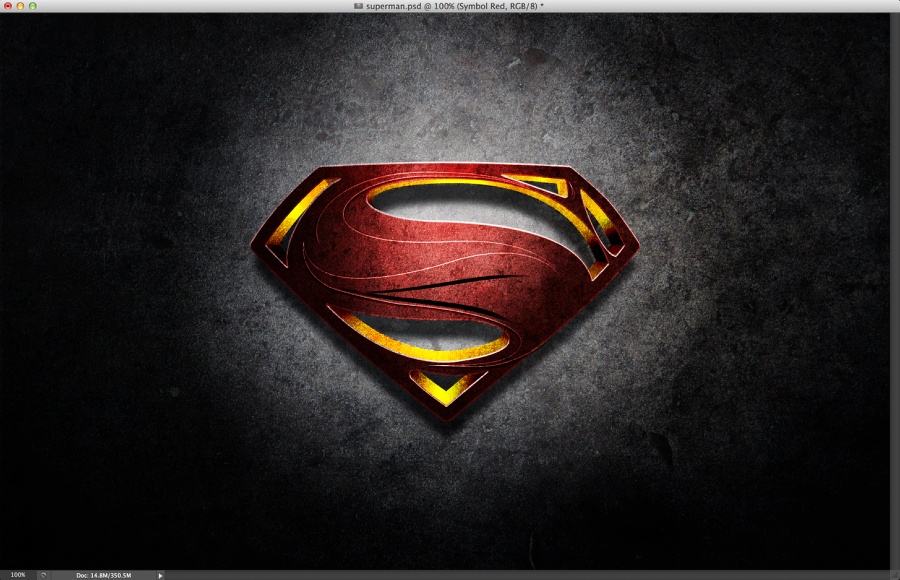
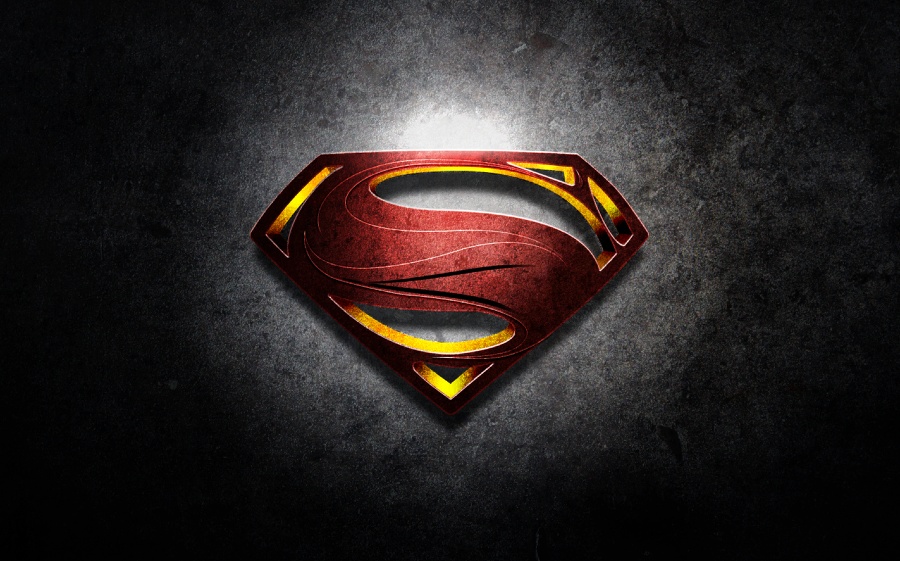
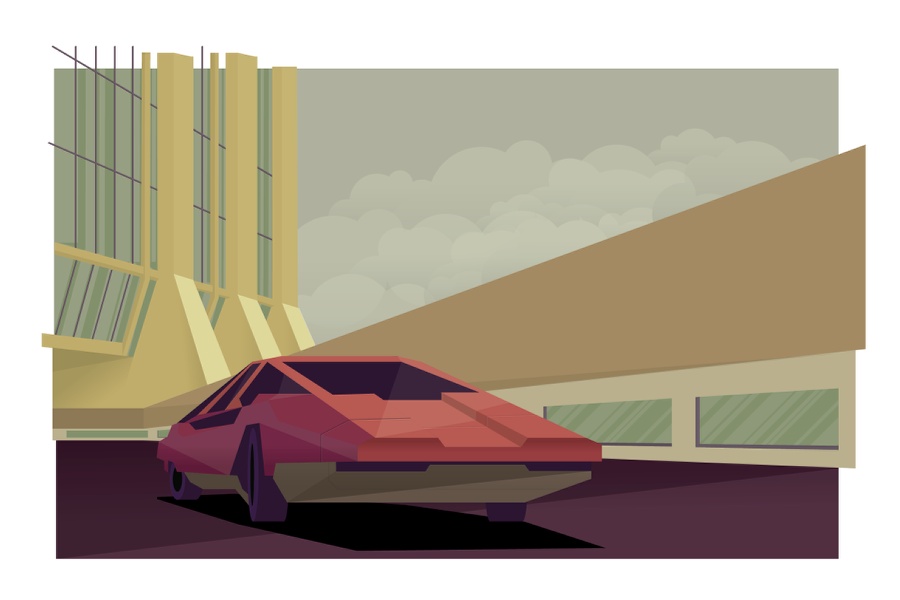
FILE PNG WARNANYA SOLID
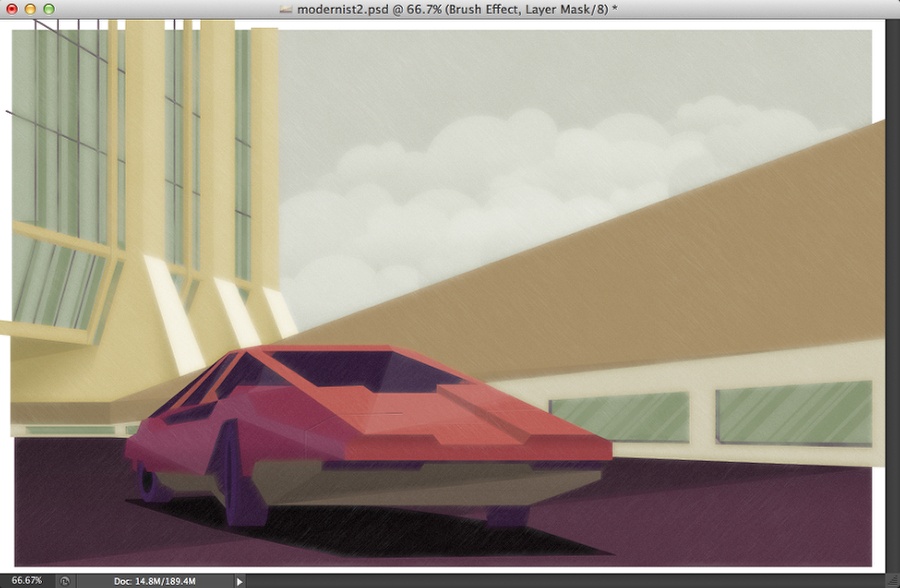
Perhatikan perbedaan PNG dan JPG di bawah ini:
PNG dan JPG
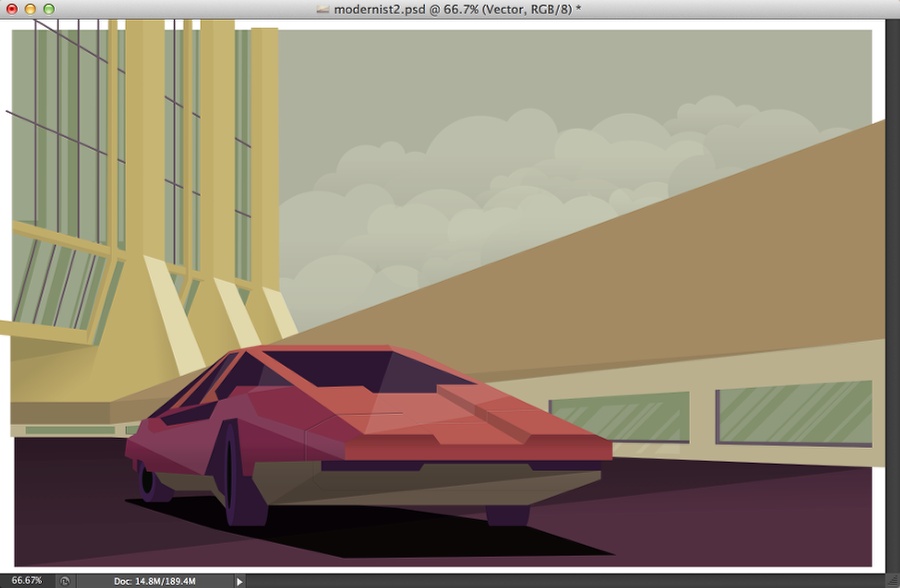
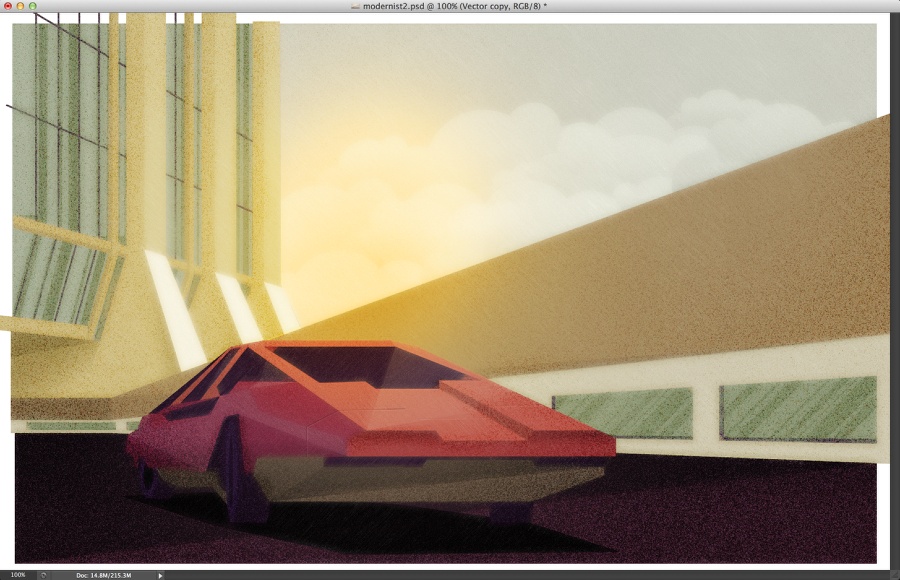
Sekilas memang sama persis yak. Tapi coba kita zoom..
JPG pecah
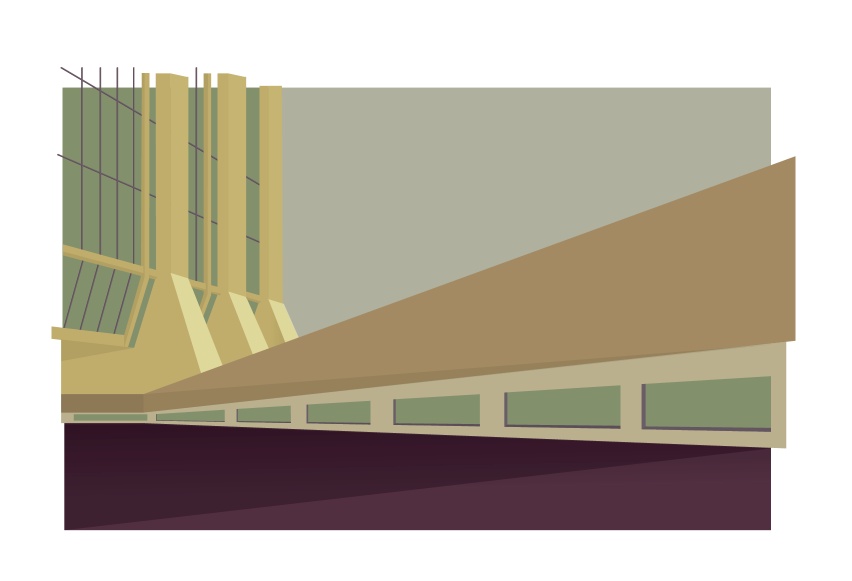
File JPG akan terlihat pecah warnanya. Walaupun seharusnya satu blok warna coklat muda, tapi entahlah dia memecah sendiri kayak sedang galau gitu.
Di beberapa sisi, warnanya bimbang banget, mau coklat muda atau agak tua, gak jelas. Jadi kalo ada anak alay yg lagi galau, dia kayak JPG banget tuh.. #apaansih
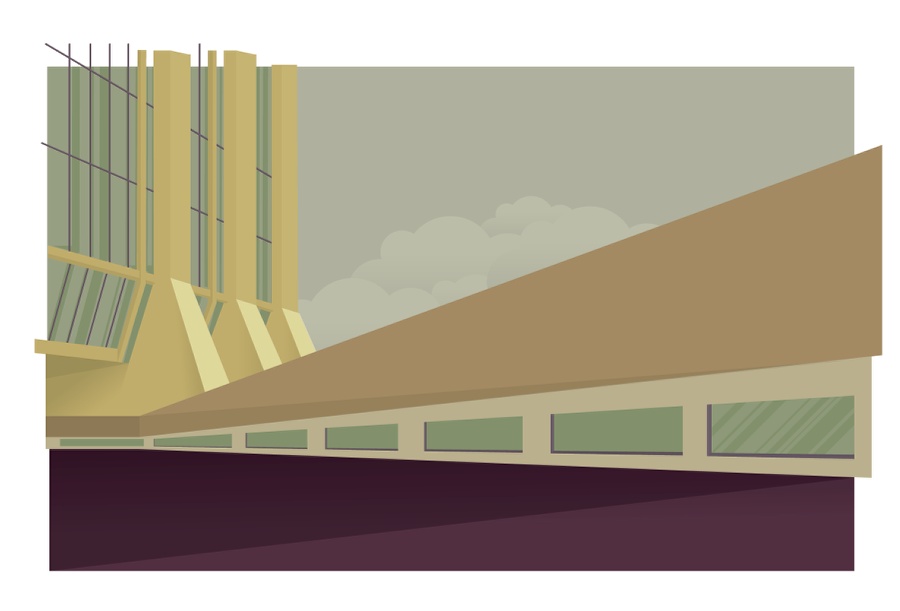
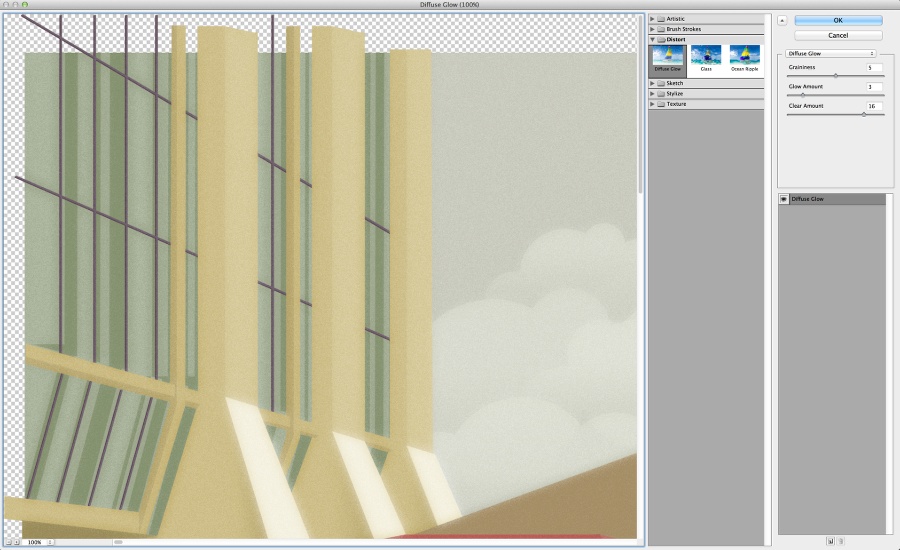
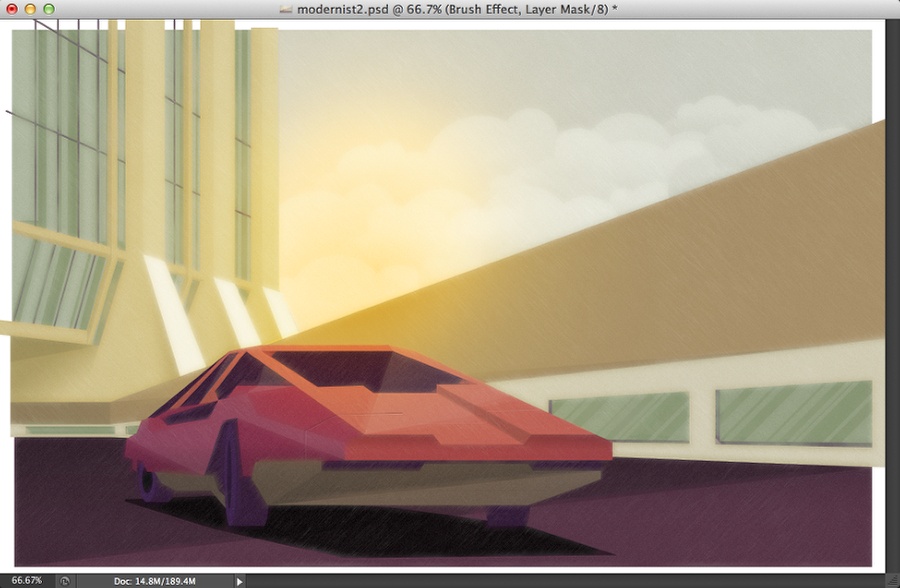
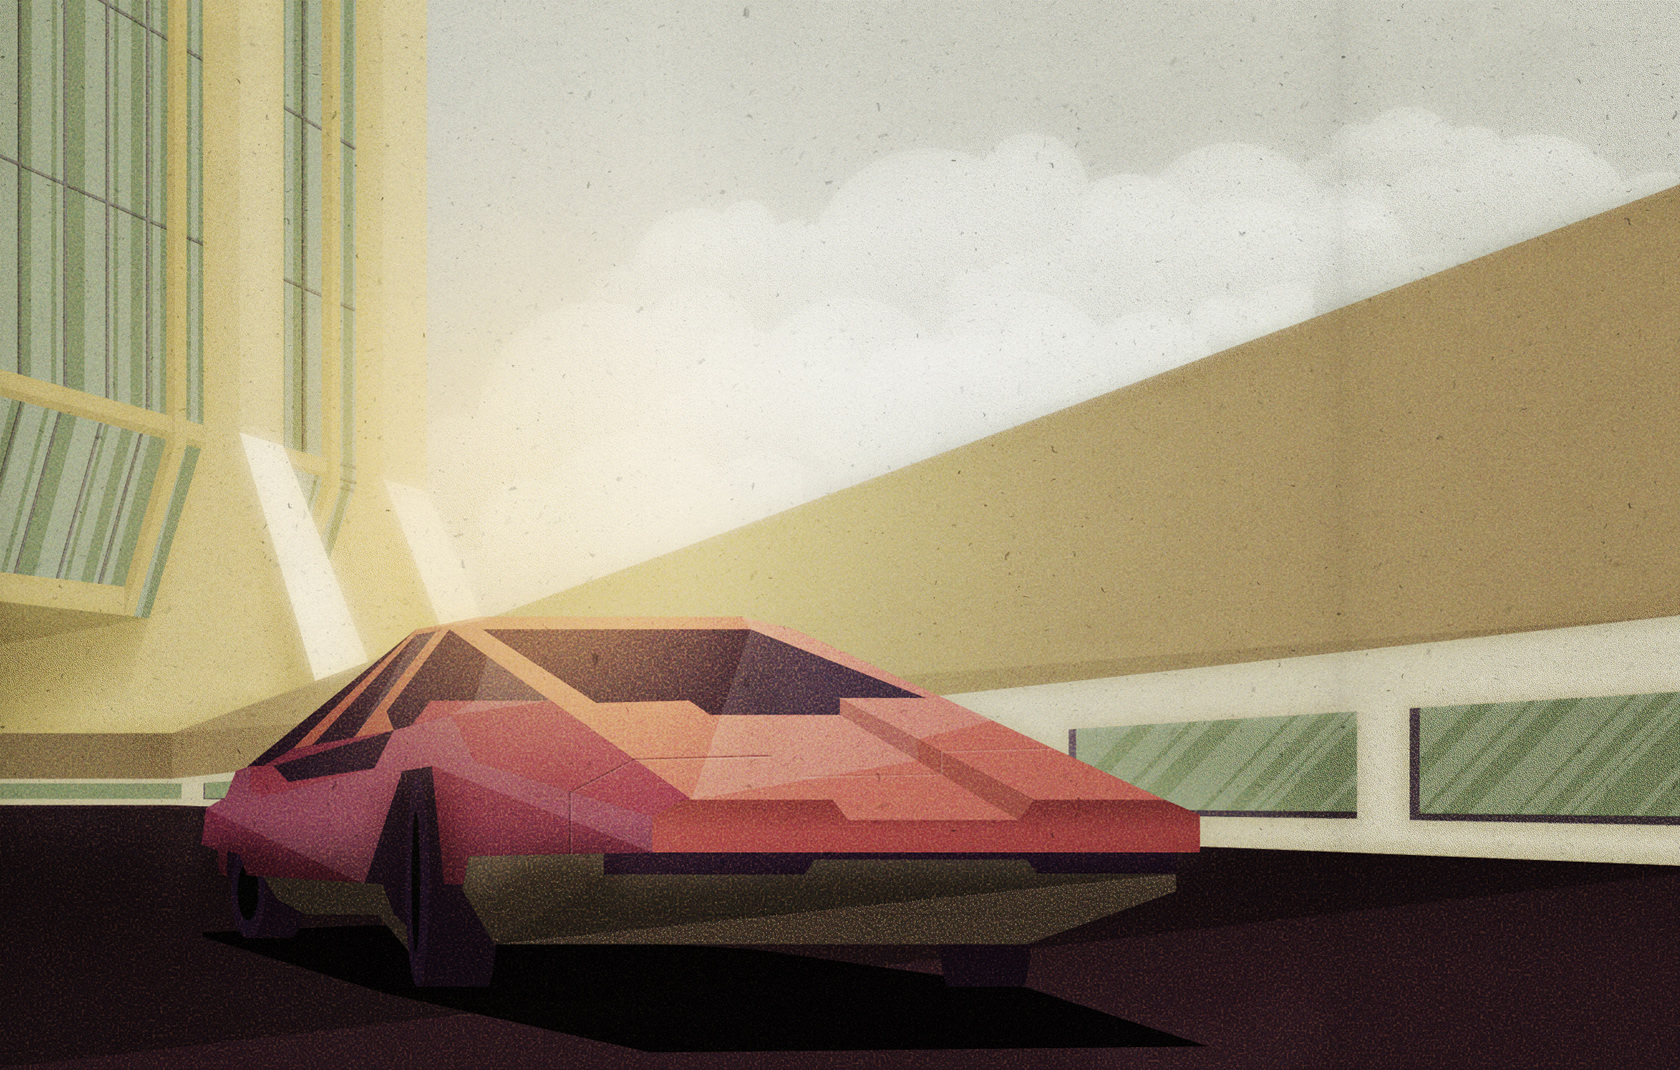
Yuk, kita lihat kalo PNG di zoom…
PNG di zoom warnanya solid
Lihat perbedaannya dengan JPG di atas. Beda banget khan? PNG warnanya lebih solid. Lebih yakin. Lebih satu tujuan. Lebih fokus. Lebih bersih. Jadi kalo kalian mau bikin nama organisasi dengan moto satu tujuan, fokus, yakin, mending kasih nama PNG saja! #apaansih #partII
FILE PNG UKURAN FILENYA LEBIH NGIRIT
JPG lebih besar ukurannya
Coba kalian save gambar di atas ini. Ukuran file JPG di atas adalah 46,3 KB. Kualitasnya di photoshop saya kasih maksimum, soalnya saya ingin kualitas terbaik.
Maksimum gimana sih ndop?
Itu loh, pas dirimu ngesave for web & devices di photoshop, khan kalo kita pilih JPG, akan ada pilihan lowmediumhighvery high, atau maximum. Nah saya pilih maksimum biar warnanya mendekati solid. JPG ga bisa solid 100 persen soalnya, selalu saja akan ada warna yg pecah, walaupun seharusnya solid.
Oke dicatat ya, ukurannya 46,3 KB (bukan Keluarga Berencana!)
PNG ukurannya lebih slim
Lalu coba save file gambar PNG di atas ini. Ukurannya cuma 17,8 KB saja!!! Saya save for web & devices di photoshop dengan pilihan PNG-8 dengan pilihan 256 warna. Karena vector saya kali ini gak pakek warna gradasi. Kalo pakai warna gradasi atau gradien atau sembur, mendingan save as PNG-24. PNG-24 jumlah warnanya tak terbatas.
Jadi begini, kalo kalian bikin logo yang hanya pakek 2 warna, misalnya hitam dan putih. Ngesavenya di photoshop pakek pilihan PNG-8 dengan pilihan 4 warna aja. Atau 8 warna. Jangan pas 2 warna, nanti hasilnya kasar. Atau kalian bisa lihat perubahannya di sebelah kiri ketika kamu ubah ke jumlah warna tertentu.
Daripada bingung, yuk kita langsung praktek:
PNG-8 2 warna
Gambar di atas ini saya Save for web & devices dengan settingan PNG-8 trus saya pilih 2 warna. Hasilnya bisa di lihat di preview sebelah kirinya. Tampak gambar vectornya berubah jadi cuma dua warna. Hijau dan krem. Ukuran file juga mengecil menjadi 2,87 KB saja!
Yuk kita coba menaikkan jumlah warnanya:
PNG-8 32 warna
Nah, kalo jumlah warnanya kita naikkan menjadi 32 warna, maka gambar akan terlihat lebih jelas. Hanya saja warna bibirnya masih coklat karena keterbatasan warna yang cuma 32.
Ukuran filenya juga naik menjadi 10,48 KB. Ya wajar soalnya jumlah warnanya bertambah.
Enaknya PNG ya begini, besarnya ukuran file tergantung jumlah warna. Tapi dengan kualitas yang sama (warna solid atau tidak pecah). Beda sama JPG, yang membedakan besarnya ukuran file adalah kualitas, bukan jumlah warna.
Nah, pekerja seni jangan kayak JPG ya, yang kualitasnya berubah-ubah sesuai tarif. Jadilah kayak PNG, dengan tarif yang berubah-ubah, yang dikurangi bukan kualitasnya, tapi “porsi”nya. #ndopquote
Kalian bisa eksperimen sendiri pakek foto wajah biasa. Kurangi warnanya, maka akan terlihat perubahannya dan besar ukuran filenya.
Sebagai produsen vector terbesar sedunia!!! yang baik hati, saya selalu ngesave file vector ke bitmap memakai jenis PNG-24. Karena saya tidak mau mengecewakan pelanggan. Ukuran file vector saya rata-rata 800 KBan. Soalnya ukurannya 60x80cm dengan 72dpi (standar web, bukan standar cetak).
Kenapa saya pakek standar 72 dpi? Karena file bitmap itu untuk keperluanpreview saja. Untuk dilihat di layar komputer gitu maksudnya. Bisa sih dicetak, tapi jangan lebih besar dari 60x80cm, kualitasnya akan menurun nanti. Untuk keperluan cetak mencetak, pakai file CDR (Corel DRaw) aja, yang sudah saya kirimkan berduet dengan PNG.
Lha kalo vectornya gak ada gradasi, kenapa nggak pakek PNG-8 saja ndop? Khan lebih irit ukuran filenya?
Pertanyaan yang sangat bagus! Tepuk tangan buat saya sendiri! 
PNG-8 itu ukuran size gambarnya solid. Jadi kalao kamu punya file gambar yg disave menjadi PNG-8, maka gak akan bisa diresize. Kalo dipaksa, akan rusak!
Perhatikan contoh di bawah ini:
PNG-8 rusak diresize
Gambar di atas adalah file PNG-8 yang ukuran aslinya 225 piksel trus saya resize menjadi 200 piksel. Perhatikan banyak sekali garis yang patah. Yup, itulah PNG-8. Sangat egois dan gak mau diatur kayak saya!!!. Bahkan kalo kamu tambahkan tulisan di atasnya pun, dia nggak mau menerima!
Trus cara mengatasinya?
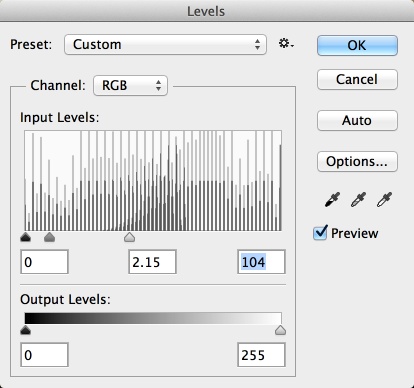
Hadeuh, pertanyaan standar! Caranya gampang beroh! Cukup ganti modenya dari yang index (perhatikan gambar di atas ada tulisan index) menjadi RGB atau CMYK terserah yg mana. Lihat gambar di bawah ini:
RGB
Sudah ngerti khan letaknya? Image > Mode > RGB. Setelah kau ubah menjadi RGB, file PNG-8 mu yang sekarang sudah berubah jinak-jinak merpati dan mau diapain saja. Gak percaya?
PNG-8 mulus
File PNG-8 yang sudah dijinakkan
ketika diresize akan tetep mulus, gak rusak.
Pokoknya bisa diapa-apain kayak file JPG biasa

Biar aman, maka klienku aku kasih file PNG-24. Karena file PNG-24 gak ada “index”nya di photoshop. Jadi aman sekali kalo mau diedit sendiri.
Btw, kenapa sih aku pakek photoshop? Bukannya pakai corel saja sudah cukup?
Pertanyaan yang sangat bagus! Tepuk tangan buat saya sendiri! 
Entahlah yah, mengeksport file vector ke bitmap mentah dari corel draw itu selisihnya besar banget dibanding kita save lagi pakek photoshop.
Yuk, kita langsung praktek:
PNG Export Mentah Corel Draw
Coba kalian save gambar di atas, ukurannya 27,9 KB. Beda jauh khan dengan ukuran PNG yang sudah saya save for web & device di photoshop yang cuma 17,8 KB. Bahkan untuk ukuran gambar yang besar, bedanya bisa jauh banget, bisa selisih 300 KB an.
Tapi kadang file PNG mentah exportan dari corel draw pun bisa lebih kecil dibanding PNG-24 nya photoshop. Jadi untuk kasus PNG-24, hanya perlu coba-coba saja. Kalo untuk PNG-8, tentu akan jauh lebih kecil dibanding PNG mentahan corel. Coba saja deh.
Udah ah. Terlalu detail ini penjelasan saya. Harusnya ditulis di buku saja kali yak. Kayaknya aku berbakat nulis buku. Betul nggak?BETUUUUUULLLL!!! <-- tumben mendukung, tapi kenapa saya coret ya?

Sunday, May 26, 2013

Man Of Steel Symbol In Illustrator And Photoshop

So in this tutorial we will show you how to create the Superman, Man of Steel logo using Illustrator and Photoshop. We will also utilize some stock photos for textures and the original poster for reference. The whole process will take from 3-5 hours depending on your pace. In the end it will be really fun to create and well worth the time spent.

Step 1

Let's start the symbol in Illustrator. With the Pen Tool (P) start creating the shield. Maker sure you have red for the stroke with a nice weight and using round corners.
Man of Steel Symbol in Illustrator & Photoshop

Step 2

Now still using the Pen Tool, start creating the S. You can use the real logo for reference.
Man of Steel Symbol in Illustrator & Photoshop

Step 3

If you notice, the Man of Steel logo has some details in the center, so let's try to replicate that using the Pen Tool. The stroke here is not really necessary because we will edit that in Photoshop later on.
Man of Steel Symbol in Illustrator & Photoshop

Step 4

Go to Effect>3D>Extrue & Bevel Options. For the Angle use: -4º, 0º, 0º with 120º for the Perspective. Change the Depth to 35pt.
Man of Steel Symbol in Illustrator & Photoshop

Step 5

Remove the caps of the 3D and then change the color to grey. Go to Object>Expand. Then go to Window>Pathfinder. SelectUnite for the Shape Mode so you have one object.
Man of Steel Symbol in Illustrator & Photoshop

Step 6

Now let's go to Photoshop. Create a new document. I am using 2880x1800 pixels. For the background use a gradient with white in the center and black on edges.
Man of Steel Symbol in Illustrator & Photoshop

Step 7

Copy the objects from Illustrator and paste them in Photoshop. It's important to make sure that each object has its own layer, so you will have one for the 3D extrusion, one for the red symbol and 2 layers for the yellow details.
Man of Steel Symbol in Illustrator & Photoshop

Step 8

Select one of the yellow details and go to Layer>Layer Styles. Select Bevel and Emboss and use the values below.
Man of Steel Symbol in Illustrator & Photoshop

Step 9

Select Inner Glow and use the values in the image below.
Man of Steel Symbol in Illustrator & Photoshop

Step 10

Last but no least, select Drop Shadow. Again use the image below for reference.
Man of Steel Symbol in Illustrator & Photoshop

Step 11

You will have an effect like the image below. The idea of the layer styles was to add a subtle white stroke with a shadow.
Man of Steel Symbol in Illustrator & Photoshop

Step 12

Group each layer into a folder, then for each folder do this: Go to Layer>Layer Mask>Reveal All. With the Brush Tool (B) and a very soft brush using black, paint in the areas marked below to hide some parts of the details.
Man of Steel Symbol in Illustrator & Photoshop

Step 13

With the Brush Tool (B), and using a hard brush, paint a little dark detail in the center. If you look at the orginal, they have some sort of the same detail. Let's create now and adjust later on in the tutorial.
Man of Steel Symbol in Illustrator & Photoshop

Step 14

Add a layer on top of the red symbol, the one that has the S and the shield. Group this new layer into a folder. With the Brush Tool (B) and a very soft brush, paint some dark areas with black at 20%.
Man of Steel Symbol in Illustrator & Photoshop

Step 15

Select the layer of the red symbols and go to Layer>Layer Style. Start by selecting Bevel & Emboss and use the values below.
Man of Steel Symbol in Illustrator & Photoshop

Step 16

Select Contour and use the default values.
Man of Steel Symbol in Illustrator & Photoshop

Step 17

Select Inner Shadow. The idea of the inner shadow is to increase the strenght of the highlights.
Man of Steel Symbol in Illustrator & Photoshop

Step 18

Now let's add a radial gradient on top with Multiply to create a more dramatic light effect.
Man of Steel Symbol in Illustrator & Photoshop

Step 19

You can add more layers to make the dark areas a bit more strong, but in the end of these steps you will probably have something similar to the image below.
Man of Steel Symbol in Illustrator & Photoshop

Step 20

Let's start adding some textures. Select the 3D layer and go to Layer>Layer Style>Color Overlay. Use yellow for the color. Place your metal texture on top of this layer, the one we are using is courtesy of Shutterstock and it's titled Metal plate steel background. Hi res texture by R-studio. After that, holding the Command(MAC)/Control(PC) keys, click on the thumb of the layer of the 3D object, that will create a marquee selection of the 3D area. Select the texture layer and group it into a folder, then with the folder selected go to Layer>Layer Mask>Reveal Selection. You will mask the layer and make just the 3D area visible. Change the Blend Mode of the folder to Multiply.
Man of Steel Symbol in Illustrator & Photoshop

Step 21

Add another layer and group it into a folder, repeat the masking process to make sure that everything you do will be only visible over the 3D area. Change the Blend Mode of the folder to Color Dodge, then with the layer select, paint some highlights with the Brush Tool (B) with a very soft brush and white for the color. Note: Start painting with 30% opacity to not make it too bright.
Man of Steel Symbol in Illustrator & Photoshop

Step 22

Repeat the same process, but this time it's going to be to create the shadows. Use Linear Burn for the Blend Mode for the folder however. Also use the Lasso Tool (L) to create the nice transition in the 3D sides (1-4)
Man of Steel Symbol in Illustrator & Photoshop

Step 23

Select the 3D layer and the red symbol layer and duplicate them. After that merge those 2 layers into one and fill this new layer with black. Move the layer down to create a little shadow and go to Filter>Blur>Gaussian Blur. Use 10 pixels for the Radius, also change the Blend Mode to Multiply at 80%.
Man of Steel Symbol in Illustrator & Photoshop

Step 24

Let's import a new texture. This time we are using another image from Shutterstock, it's titled Metal background byPhiseksit. Use Soft Light for the Blend Mode.
Man of Steel Symbol in Illustrator & Photoshop

Step 25

Duplicate the texture layer and move the layer position so it is on top of all other layers. Maker a Marquee Selection of the symbol only and go to Layer>Layer Mask>Reveal Selection. The only area visible of the texture will be the one over the symbol. Change the Blend Mode to Overlay.
Man of Steel Symbol in Illustrator & Photoshop

Step 26

Let's add another texture. This one this time is from Google Images and you can find it herehttp://www.texturex.com/albums/Metal-Textures/TextureX%20steel%20texture.... Place it at the top of all other textures and use Soft Light for the Blend Mode at 70%.
Man of Steel Symbol in Illustrator & Photoshop

Step 27

Now let's add the final texture, this one will be underneath the last 2, but still on top of all other layers. You can download it at http://fc00.deviantart.net/fs50/f/2009/262/3/f/Scratched_Steel_Texture_b... . Use Soft Light for the Blend Mode as well.
Man of Steel Symbol in Illustrator & Photoshop

Conclusion

Add another layer on top of all layers and group it into a folder. Change the Blend Mode of the folder to Linear Dodge at 80% Opacity. Select the layer in this folder and then with the Brush Tool (B) and a very soft brush, paint a spot light with white at the top of the symbol. After that your design is pretty much done. You can of course improve the details and textures, but the process won't change, so now it's up to you to make it the way you want it.
Man of Steel Symbol in Illustrator & Photoshop

Download Photoshop file

Retro Moderinist Artwork In Illustrator And Photoshop

It's the retro/futuristic/geometric illustration style I've been seeing more and more often. This illustration is inspired by the work of Justin Mezzell, Matthew Lyons and Dan Matutina. I also see that James White has been experimenting with this style as well. In my case I will try to share a simple and easy way to achieve the style using Illustrator and Photoshop. As it is my first attempt, bear with me and let me know if you have any tips to improve it.

So in this tutorial I will show you how to create a Retro Futuristic Illustration using Adobe Illustrator and Photoshop. I won't add a lot of details on how to create the shapes, it's more like a simple walkthrough on how I create the illustration.

Step 1

Open Illustrator and start creating the composition. As I am learning I used an old illustration for reference so I could understand exactly what give the illustration the style I want. In this case the vanishing points, perspective and very geometric forms are the secret. I started creating everything in greyscale. Once I had the basic objects I moved to the color part.
Retro Futuristic Artowrk in Illustrator and Photoshop

Step 2

Another important thing was to understand the color palette that would give the effect I wanted. Once again, I got one illustration from Justin Mezzell and start using some of the colors he used to see If I could achieve the same effect.
Retro Futuristic Artowrk in Illustrator and Photoshop

Step 3

After coloring, it was time to add some dimensionality to the image. The first and most important thing is the use of hard shadows. Most of these designs are inspired by old ads and architecture illustrations where hard shadows were vey common. To create the basic shadows I used black at 10% with Multiply for the Blend Mode. I also added some frames for the windows to create the 3D effect.
Retro Futuristic Artowrk in Illustrator and Photoshop

Step 4

To increase a little bit more the realism I added some subtle gradients as you can see in the image below. For the gradient colors I used white and black at 10% with multiply for the opacity.
Retro Futuristic Artowrk in Illustrator and Photoshop

Step 5

To create the clouds I used basic circles and pathfinder to unite them into one object. After that I apply the same subtle gradient. One I had a basic cloud, I started duplicating it and playing with sizes and angles.
Retro Futuristic Artowrk in Illustrator and Photoshop

Step 6

For the car it was pretty much the same thing, just some angular shapes, not using curves at all. At this point I had understood a little bit more of geometric illustraitons so I started deviating from the original illustration I was using for reference. Notice the reflection on the windows, that was a really nice touch that I saw in the work of Justin Mezzell as well.z
Retro Futuristic Artowrk in Illustrator and Photoshop

Step 7

Time to go to Photoshop to add some effects. Copy the composition from Illustrator and paste it in Photoshop. I am using 2880x1800 for the size.
Retro Futuristic Artowrk in Illustrator and Photoshop

Step 8

I always paste vectors as Smart Objects, so I can always tweak them without destroying everything. So the first thing to do is go to Filter>Filter Gallery>Difuse Glow. Use the values below to add some nice grain to the image.
Retro Futuristic Artowrk in Illustrator and Photoshop

Step 9

Duplicate the layer and then go to Filter>Filter Gallery>Brush Strokes>Angled Strokes. Use the values in the image below. The idea here is to add some brush deformations. The best thing would be do that by hand, but for the tutorial we will stick to filters.
Retro Futuristic Artowrk in Illustrator and Photoshop

Step 10

Reduce the opacity of the layer with the angled strokes to 80% with Lighten for the Blend Mode.
Retro Futuristic Artowrk in Illustrator and Photoshop

Step 11

With the Brush Tool (B) and a very soft brush, paint a nice orange spot to create a sunset effect. I used Overlay for the Blend Mode at 100%
Retro Futuristic Artowrk in Illustrator and Photoshop

Step 12

Duplicat the illustraiton layer and then go to Filter>Distort>Mezzotint. Use Fine Dots.
Retro Futuristic Artowrk in Illustrator and Photoshop

Step 13

Go to Image>Adjustmetns>Desaturate. Then change the Blend Mode to Color Dodge. You will have something like the image belowl.
Retro Futuristic Artowrk in Illustrator and Photoshop

Step 14

Go to Image>Adjustments>Levels. Reduce the white input levels to 100 or a bit more. The goal here is to make the light grains almost invisible.
Retro Futuristic Artowrk in Illustrator and Photoshop

Step 15

With the Eraser Tool (E) you can delete some areas of the grain layer to make it less strong. I tried to hide the grains on the lighter areas and make it visible on the dark ones.
Retro Futuristic Artowrk in Illustrator and Photoshop

Conclusion

You can also do the same as the previous steps for the dark grains to create another layer with lighter grains. It will make the effect a little bit better and more real. Your design after this will be pretty much done and as I said, it was the first time I tried something like this. I am still learning and it is up to you to take it from here and make it perfect. If you do so, share with us, we would love to see what you can come up with.
Retro Futuristic Artowrk in Illustrator and Photoshop

Download Photoshop file